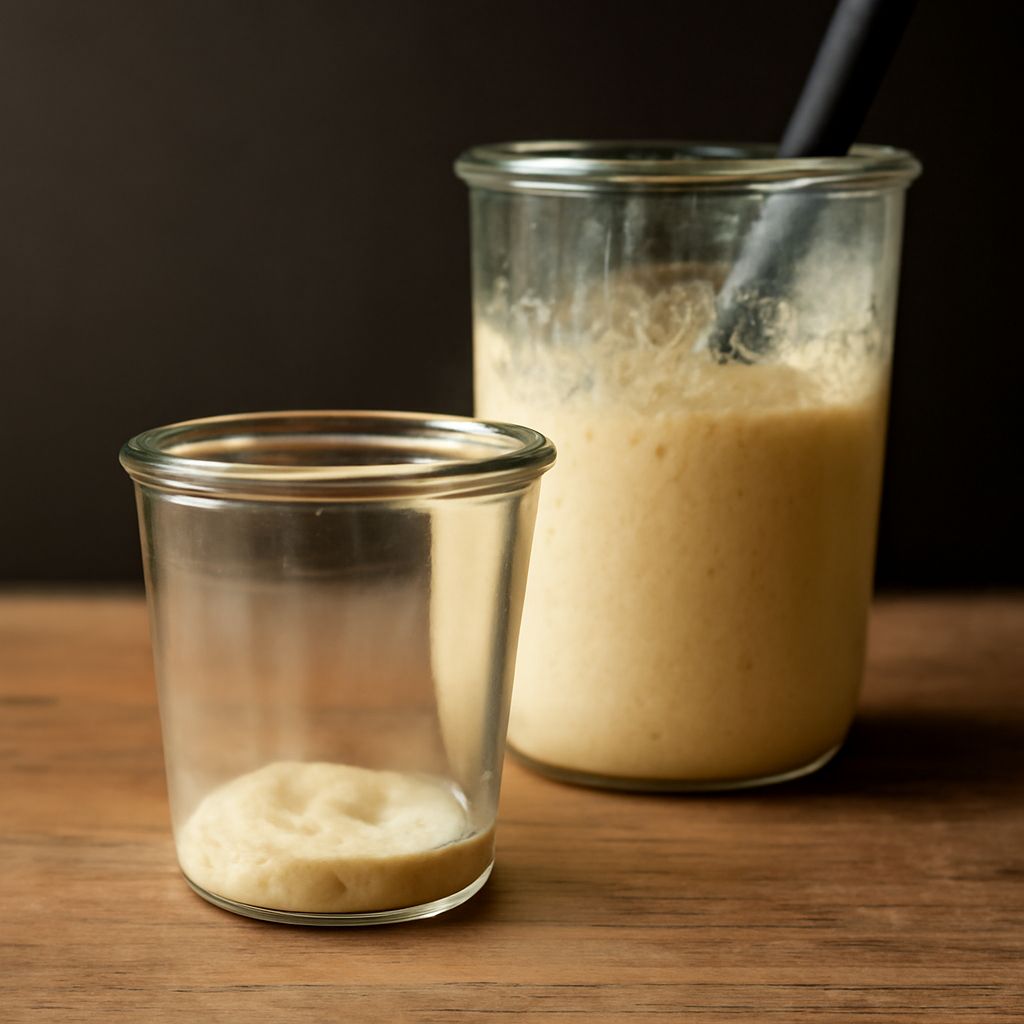
Levain bread is the pinnacle of slow-fermented, naturally leavened baking. It delivers a deep, nuanced flavor, chewy crust, and open crumb that set it apart from conventional yeast breads. Crafting levain bread at home requires patience, attention to detail, and an active levain starter—your living leavening agent. This guide gives you a complete, step-by-step process to make authentic levain bread, from understanding your starter to mastering every stage of the bake. Whether you’re an experienced baker or just starting out, you’ll find everything you need to achieve artisan-quality results.
What Is Levain Bread?
Levain bread is a type of sourdough bread made with a levain starter, which is a naturally cultured mixture of flour and water teeming with wild yeasts and lactic acid bacteria. Unlike breads that use commercial yeast for a quick rise, levain bread relies entirely on this starter for fermentation and leavening, which develops its characteristic tangy flavor, complex aroma, and chewy texture. This technique has roots in French and European baking traditions, where the term “levain” simply means leaven or ferment.
Levain bread stands out for its rustic appearance, open and airy crumb, blistered crust, and slightly tangy taste. The slow fermentation process not only enhances the bread’s flavor but also makes it more digestible, as the wild yeasts and bacteria help break down gluten and phytic acid in the flour. You’ll notice that levain bread keeps fresh longer than commercial yeast breads, thanks to the acidity produced during fermentation.
Artisan bakeries often showcase levain bread as their signature loaf, but with the right approach, you can achieve the same results in your own kitchen. The process takes more time than standard bread baking, but each step—mixing, folding, shaping, and baking—adds depth and structure to the final loaf. The reward is a bread with a crisp crust, moist interior, and naturally developed flavor that store-bought bread can’t match.
Because levain bread is made from just flour, water, salt, and levain starter, every choice—from flour blend to fermentation time—affects your results. The following sections will demystify the key concepts and help you master the foundational skills you need for exceptional levain bread.
Understanding Levain Starter
A levain starter is the heart of levain bread. It’s a living culture of wild yeast and lactic acid bacteria, maintained with regular feedings of flour and water. Unlike a direct sourdough starter that’s used as-is, a levain starter typically refers to a portion of your ongoing sourdough starter that you build up specifically for a bake. This build ensures the levain is at peak activity when you mix your dough.
To maintain a healthy levain starter, you’ll need to feed it daily if kept at room temperature, or at least once a week if stored in the refrigerator. Each feeding involves removing a portion of the starter, then adding fresh flour and water. Over time, the starter develops a stable population of wild yeasts (primarily Saccharomyces cerevisiae and Candida milleri) and lactic acid bacteria (such as Lactobacillus species) that ferment the dough naturally.
Before baking, you’ll create a “levain build” by taking a small amount of your maintenance starter and mixing it with additional flour and water. This levain matures for several hours, becoming bubbly and aromatic. The ideal levain is at its peak when it has roughly doubled in size, appears slightly domed on top, and smells pleasantly tangy—never sharply acidic or off.
Using an active levain starter is crucial for proper fermentation and a good rise. If your levain doesn’t pass the “float test” (a spoonful of levain floats in water), it may not be active enough to leaven bread successfully. Make sure you schedule your levain build so it’s at peak activity when you’re ready to mix your dough.
Essential Ingredients and Tools
Levain bread is made with just a handful of high-quality ingredients, but each one plays a critical role in the final loaf. Here’s what you’ll need:
- Flour: Use unbleached, high-protein bread flour for structure and rise. Many bakers blend bread flour with whole wheat or rye flour to add flavor and complexity. A common starting point is 80% bread flour and 20% whole grain flour.
- Water: Use filtered or spring water if possible, as chlorine can inhibit yeast activity. Room temperature is best for mixing, but you may adjust the water temperature to control fermentation rate.
- Salt: Fine sea salt or kosher salt enhances flavor and controls yeast and bacterial activity. Avoid table salt with additives.
- Levain starter: A healthy, active levain built from your ongoing starter as described above.
For the best results, precise measurements are essential. Use a digital kitchen scale to weigh all ingredients, as even small differences can affect hydration and texture. Hydration (the ratio of water to flour) is typically 70-78% for levain bread, resulting in a moist, slightly sticky dough that produces an open crumb.
Key tools for levain bread include:
- Mixing bowls for dough and levain build
- Bench scraper for handling and shaping the dough
- Proofing baskets (bannetons) to support the dough during its final rise
- Sharp lame or serrated knife for scoring the dough before baking
- Cast iron Dutch oven or baking stone/steel to trap steam and create a crisp crust
- Thermometer (optional) to check dough and internal bread temperature
Having the right ingredients and tools sets you up for success, but understanding the process is equally important. Next, you’ll see exactly how to make levain bread from start to finish.
Step-by-Step Levain Bread Recipe
This recipe yields one large round loaf (boule) or two smaller loaves. The process is broken down into key stages to help you master each part. Total time, including fermentation and proofing, is about 18-24 hours, but most of that is hands-off. Plan to start your levain build the night before you want to bake.
Feeding and Preparing Your Levain Starter
-
12-16 hours before mixing dough (the night before): Prepare your levain build. In a clean jar or bowl, combine:
- 50g active starter
- 50g unbleached bread flour
- 50g whole wheat flour
- 100g filtered water
Mix thoroughly, cover loosely, and let ferment at room temperature overnight (68-75°F is ideal). By morning, the levain should be bubbly, doubled in size, and have a pleasant, mildly sour aroma.
- Check readiness: Perform the float test. Drop a small spoonful of levain into a glass of water—if it floats, it’s ready to use. If not, give it another hour or two at room temperature.
Mixing and Autolysing the Dough
-
Combine flour and water (autolyse): In a large mixing bowl, combine:
- 450g unbleached bread flour
- 100g whole wheat flour
- 375g water (reserve 25g for later)
Mix until no dry flour remains. Cover and let rest for 45-60 minutes. This rest (autolyse) hydrates the flour, kick-starts gluten formation, and improves dough texture.
- Add levain and salt: Sprinkle 12g fine sea salt over the dough. Add the 250g active levain you built earlier, along with the reserved 25g water. Mix by hand, pinching and folding until fully incorporated. The dough will feel sticky and loose but will strengthen as you fold.
Bulk Fermentation and Folding
-
First rise (bulk fermentation): Cover the bowl and let the dough ferment at room temperature for 4-6 hours, depending on your kitchen temperature. During this time, you’ll develop strength with stretch-and-folds:
- After 30 minutes, perform your first stretch-and-fold. Grasp one edge of the dough, stretch it upward, then fold it over the center. Repeat 3 more times, turning the bowl a quarter turn each time.
- Repeat stretch-and-folds every 30-45 minutes, for a total of 3-4 rounds.
The dough should become smoother, rise 50-75%, and show bubbles on the surface by the end of bulk fermentation.
- Check fermentation: If the dough jiggles and has visible bubbles, you’re ready to shape. If not, give it another 30-60 minutes.
Shaping and Final Proof
- Pre-shape: Gently turn the dough onto a lightly floured surface. Use a bench scraper to shape it into a loose round. Cover and let rest for 20-30 minutes to relax the gluten.
- Final shaping: Shape the dough into a tight ball for a round loaf or a batard for an oval loaf. Use gentle tension to create a smooth surface without tearing the dough.
- Proof: Place the shaped dough seam-side up in a well-floured proofing basket or bowl lined with a floured towel. Cover and let rise at room temperature for 1-2 hours, until slightly puffy. For better flavor and oven spring, refrigerate the proofed dough for 8-12 hours (retardation), covered, which also makes scoring easier.
Baking Your Levain Bread
- Preheat oven: Place a Dutch oven (or baking steel/stone) inside your oven and preheat to 500°F (260°C) for at least 45 minutes.
- Score the dough: Turn the dough onto a piece of parchment paper. Use a sharp lame or serrated knife to score the surface—this controls expansion and creates an attractive pattern.
- Bake with steam: Transfer the dough (on parchment) into the hot Dutch oven. Cover with the lid and bake for 20 minutes. Remove the lid and bake another 25-30 minutes at 450°F (232°C), until the crust is deeply browned and crackling.
- Check doneness: The loaf should sound hollow when tapped on the bottom, and the internal temperature should be 208-210°F (97-99°C).
- Cool completely: Let the bread cool on a wire rack for at least 2 hours before slicing. This allows the crumb to set and improves flavor.
Troubleshooting and Tips for Success
Levain bread rewards patience, but the process can seem daunting at first. Here are common challenges and proven tips to help you succeed:
- Dough too sticky or wet: High-hydration doughs are meant to be tacky but shouldn’t be unmanageable. Use a bench scraper, wet your hands for folding, and avoid adding extra flour unless absolutely necessary.
- Flat loaf or poor rise: This usually indicates an under-active levain starter or underproofed dough. Make sure your levain passes the float test before mixing dough, and don’t rush bulk fermentation—the dough should noticeably expand and bubble.
- Dense crumb: Overmixing, underproofing, or insufficient dough strength can cause tight crumb. Strengthen dough with consistent stretch-and-folds, and let it ferment until well aerated.
- Overproofed dough (spreads out, lacks spring): Dough that becomes overly soft or collapses likely proofed too long. Next time, shorten proofing time, especially if your kitchen is warm.
- Pale crust: Increase baking time, remove the lid earlier for more browning, or use a preheated baking stone to boost oven heat retention.
For best results, maintain your levain starter with regular feedings, use high-quality flour, and experiment with fermentation times and hydration until you dial in your preferred loaf. Many bakers keep a detailed baking log to track changes and outcomes. If you’re new to levain bread, practice the process several times—each bake will teach you something new about timing, dough feel, and flavor development. Eventually, you’ll develop the skills and intuition to create levain bread that rivals your favorite bakery loaf.